 |
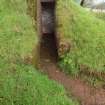
On-line Digital Images |
DP 347430 |
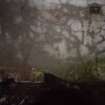
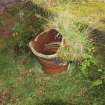
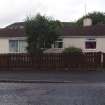
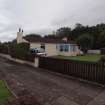
Rhobodach: The original entrance to the air raid shelter |
26/9/2019 |
Item Level |
 |
On-line Digital Images |
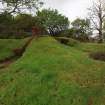
DP 347431 |
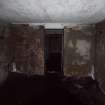
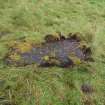
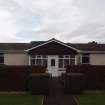
Rhobodach: The air raid shelter from the ESE |
26/9/2019 |
Item Level |
 |
On-line Digital Images |
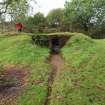
DP 347432 |
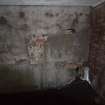
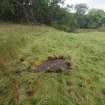
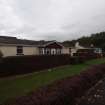
Rhobodach: The air raid shelter from the NE showing the secondary entrance |
26/9/2019 |
Item Level |
 |
On-line Digital Images |
DP 347407 |
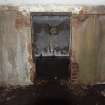
Balnakailly: The control room from the ESE showing the metal rungs leading up to the escape hatch |
24/9/2019 |
Item Level |
 |
On-line Digital Images |
DP 347408 |
Balnakailly: The SW corner of the control room, with the chimney pipe for the stove immediately to the right |
24/9/2019 |
Item Level |
 |
On-line Digital Images |
DP 347409 |
Balnakailly: View ESE from the control room across the lobby into the generator compartment |
24/9/2019 |
Item Level |
 |
On-line Digital Images |
DP 347410 |
Balnakailly: Empty spaces in the render for switchboards and the cluster of three pipes at the foot of the NNE wall in the control room |
24/9/2019 |
Item Level |
 |
On-line Digital Images |
DP 347411 |
Balnakailly: View ESE across the lobby into the generator compartment |
24/9/2019 |
Item Level |
 |
On-line Digital Images |
DP 347412 |
Balnakailly: The NNE wall of the generator compartment, with an empty space in the render for a switchboard over a vent just above the floor |
24/9/2019 |
Item Level |
 |
On-line Digital Images |
DP 347413 |
Balnakailly: The large central exhaust vent in the ESE wall of the generator compartment |
24/9/2019 |
Item Level |
 |
On-line Digital Images |
DP 347414 |
Balnakailly: The vent in the SSW wall of the generator compartment |
24/9/2019 |
Item Level |
 |
On-line Digital Images |
DP 347415 |
Balnakailly: The ceramic ventilation pipe to the ESE of the entrance (connected to the vent in the SSW wall of the generator compartment), which conveyed gasses through the earthen blast wall |
24/9/2019 |
Item Level |
 |
On-line Digital Images |
DP 347416 |
Balnakailly: Close-up of the ceramic ventilation pipe to the ESE of the entrance connected to the vent in the SSW wall of the generator compartment |
24/9/2019 |
Item Level |
 |
On-line Digital Images |
DP 347417 |
The turf covered platform on a terrace overlooking Balnakailly Bay (NS 02303 74193) |
24/9/2019 |
Item Level |
 |
On-line Digital Images |
DP 347418 |
View WNW over the turf covered platform (NS 02303 74193) |
24/9/2019 |
Item Level |
 |
On-line Digital Images |
DP 347419 |
View N over the turf covered platform (NS 02303 74193) |
24/9/2019 |
Item Level |
 |
On-line Digital Images |
DP 349705 |
No. 2 Ardgowan Road from the S |
27/9/2019 |
Item Level |
 |
On-line Digital Images |
DP 349706 |
No. 4 Ardgowan Road from the S |
27/9/2019 |
Item Level |
 |
On-line Digital Images |
DP 349707 |
No. 4 Ardgowan Road from the SW, with No. 2 beyond |
27/9/2019 |
Item Level |
 |
On-line Digital Images |
DP 349708 |
No. 4 Ardgowan Road from the SE |
27/9/2019 |
Item Level |
 |
On-line Digital Images |
DP 349709 |
No. 2 Ardgowan Road from the SW |
27/9/2019 |
Item Level |
 |
On-line Digital Images |
SC 2216884 |
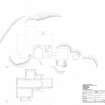
Carmunnock Battery, ground and floor plan of Command Post |
17/4/2019 |
Item Level |
|
Prints and Drawings |
DC 57786 |
Plan and section of Gleniffer Braes decoy control centre |
29/10/2018 |
Item Level |
|
Prints and Drawings |
DC 57785 |
Auchenreoch Decoy Site, Control Centre plans and sections |
30/10/2018 |
Item Level |


